
Page 6 - Scholastic EasyScan®2 Quick Start Guide
P. 6
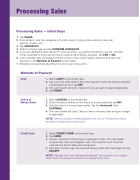
Processing Sales
Processing Sales — Initial Steps
1. Tap SALES.
2. Scan all items. Use the categories in the left column to ring up items without a barcode
(pencils, erasers, etc.).
3. Tap CHECKOUT.
4. Select customer type and tap CONFIRM CHECKOUT.
5. If you are offering the All for BooksTM round-up option, you will be prompted to ask the customer
if they would like to round up the total to make an All for Books donation. Tap YES or NO.
6. A list of tender types will display in the left column of the screen. Make a selection and follow the
directions in the Methods of Payment section below.
7. Receipt(s) will automatically print at the end of each transaction.
Methods of Payment
Check or Money Order
1. Select CHECKS as the tender type.
2. Enter the amount written on the check or money order and tap PAY. 3. Enter the check or money order number. Tap the checkmark, then
CONTINUE.
4. The cash drawer will open. Deposit check or money order and give change
(if applicable).
NOTE: Checks should be made payable to the school. The amount cannot exceed $20 more than the purchase.
4
Cash 1. Select CASH as the tender type.
2. Tap one of the three options above the keypad or enter the amount received.
If entering the amount, tap PAY.
3. The cash drawer will open. Deposit money and give change (if applicable). 4. Tap FINISH.
Credit Card
1. Select CREDIT CARD as the tender type.
2. Tap CARD.
3. Instruct customer to follow steps on payment screen. The card reader
accepts chip cards and magnetic strip. The customer must insert the
card with the front of their card facing them.
4. Have the customer sign the customer-facing screen with their  nger and tap
ACCEPT.
NOTE: Heritage Visa® and Heritage MasterCard® are currently not accepted. Debit cards that require a PIN are not accepted at this time.
